|
|
|
products > NLE Products > Velocity™ NLE systems family > VelocityHD |
|
|
||
|
|
|
|
||||
|
|
||||||
|
How to get the max from Windows Media codecs and Velocity
To get the max from Windows media codecs it is required to update the Windows Media codecs with a more advanced version available on the Microsoft site or here: Warning: The installer works in background and it is required to wait the message "Windows Media Format 11 Runtime Setup has completed". Later it is required to reboot the system to get the new codecs.
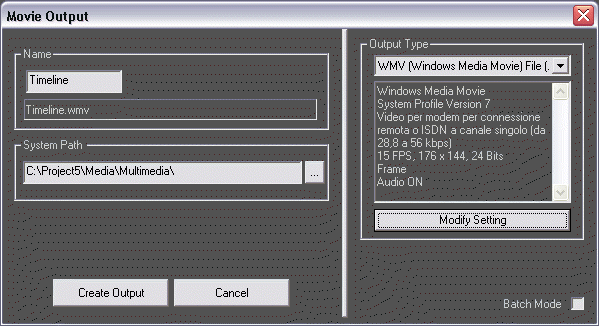
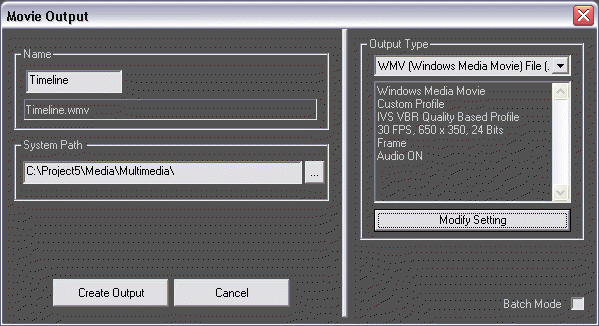
In velocity from menu Output > Movie Output please select the WMV option. Later please click on Modify Setting button repoted in the Movie Output dialog
Please click on Custom Profile Manager button
Please click on New button
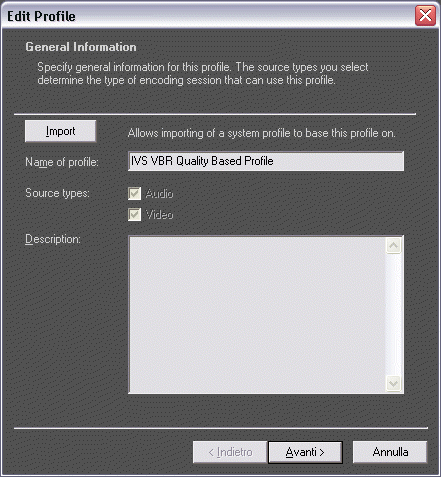
Please type the name of your new profile. After please click on Next button (Avanti = Next in the Italian OS)
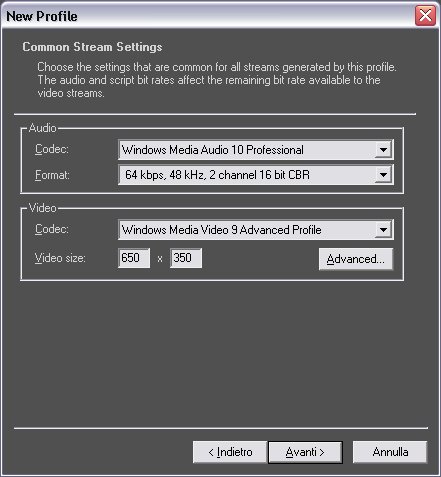
Please select the preferred audio codec, bitrate and related sampling mode. Please select the preferred video codec: Windows Media 9 Advanced Profile Please define the target resolution as you prefer. Please click on Next button.
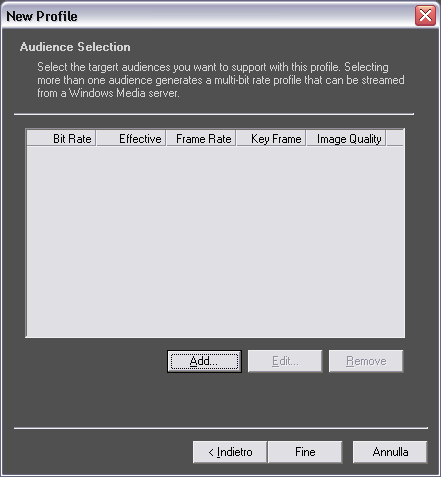
Please click on Add... button.
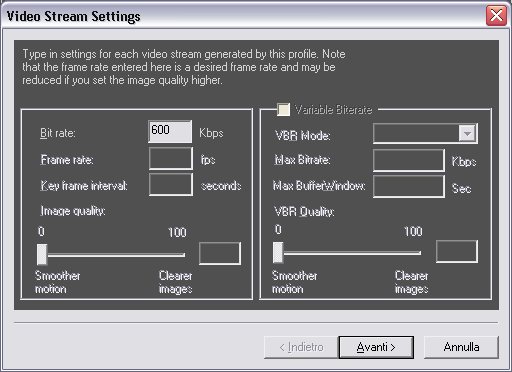
Please specify the video bit rate to proceed (warning!: the value reported is only a reference because to get the best quality from Windows Media codecs we will use another way to determine the target bitrate). Please click on Next button.
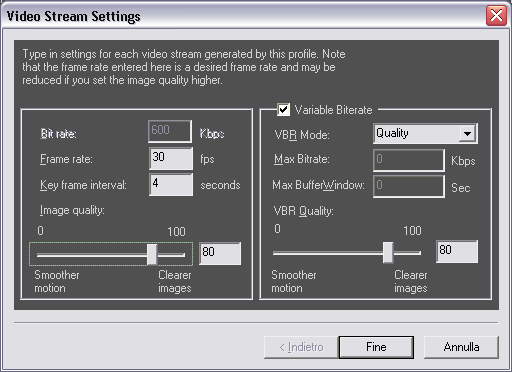
Please specify the desired target Frame rate and set the Image Quality Slider on 80 Please enable Variable Bitrate checkbox Please set VBR Mode on Quality Please set the Image Quality Slider on 80 (Warning! this slider is the key to get optimal results adjusting the quality and the related target birate. The final results can variate and depends from the source quality: to get still better results please to try to adjust it in a range from 75 to 88) Please click on End button. (Fine = End)
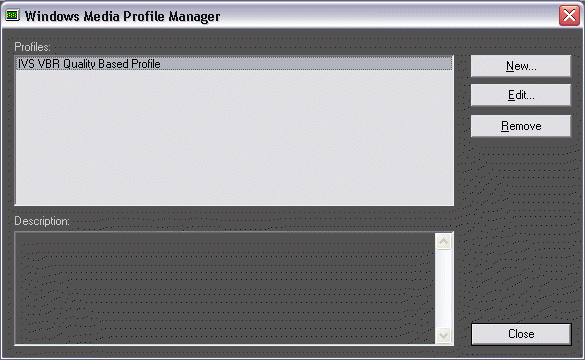
Here is your new audience profile Please click on Edit button to modify it again or click on End button to back on the Windows Media Profile Manager window
Please click on Close button to back to Velocity Windows Media Movie Settings dialog
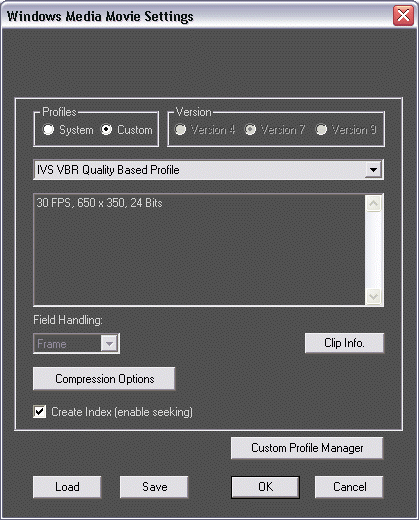
Please enable Custom Profiles radio button and select the desired custom profile (IVS VBR QUALITY BASED PROFILE) Please enable Create Index
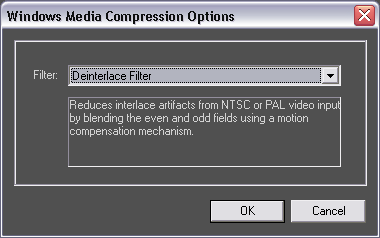
Clicking on Compression Options you can enable some image processing filter as the Deinterlace filter For target vertical resolution under the single field source resolution (24X for NTSC and 288 for PAL) please set Field Handling on Field1 or Field2 and never to use the Deinterlace Filter (only Velocity version 9) In my opinion to get crisp images, is better to use the Deinterlace filter only when the target Y is greater than the single field Y resolution and when there is several motion in the scenes.
Please click on OK to continue.
Please click on Create Output button to generate your new Windows Media movie
|
||||||
|
Some Informations about IVS
|
||||||
|
|
|
|
||||
Copyright 2008-2013 Interactive Video Systems Srl - P.IVA/Vat : 06019021218 |
||||||

